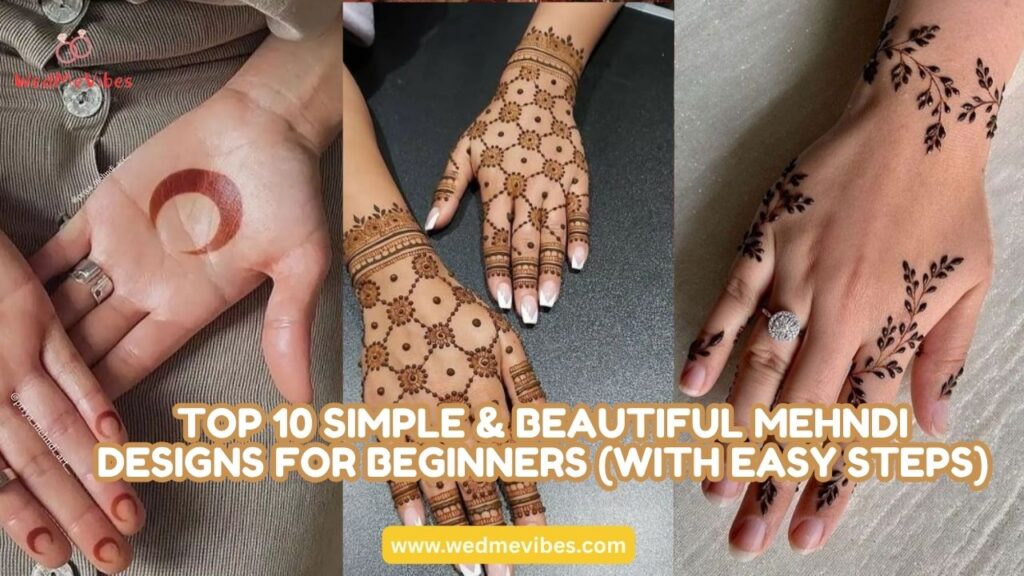
Every mehndi artist you admire today once started exactly where you are — sitting with a cone in their hand, drawing a shaky line or a wobbly circle, and wondering if they’d ever get it right.
The good news? You don’t need years of practice to create something beautiful. You just need the right designs — simple enough to finish confidently, yet pretty enough to feel proud of.
This is not another collection of complicated inspiration pictures you can’t recreate. Every design here is genuinely beginner-friendly, clearly explained step-by-step, and completely doable — even if it’s your first time.
So take a deep breath, pick up your cone, and let’s begin.
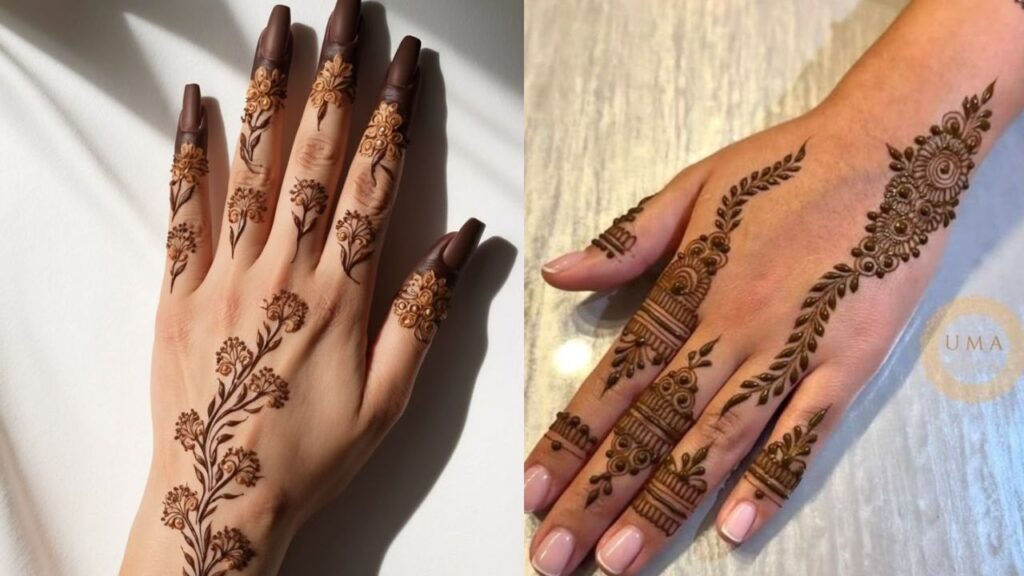
1. Simple Rose Motif
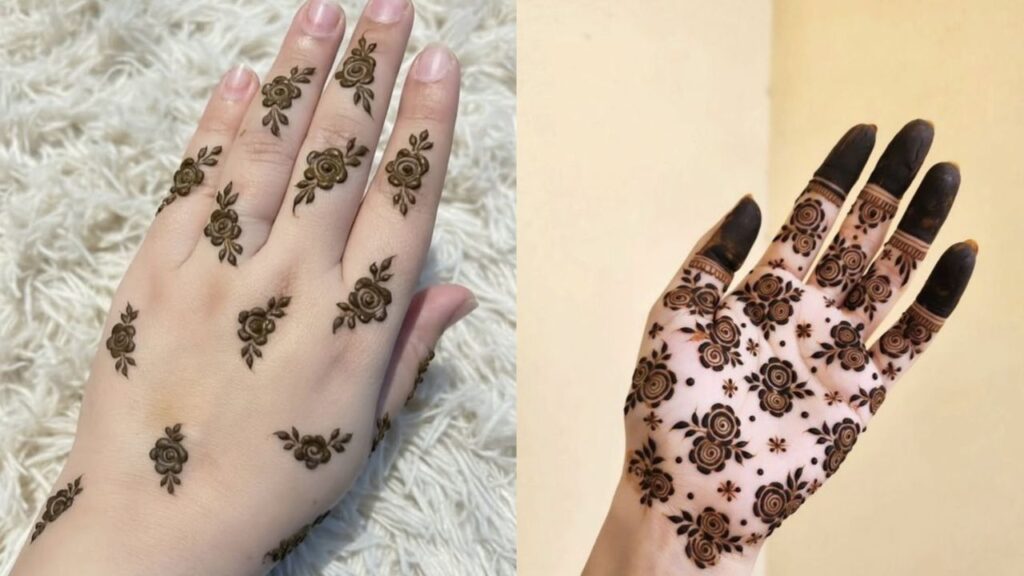
Steps: Start with a tight spiral in the center → expand outward into layered petals → leave the outer petals slightly open.
The rose is the most loved design for beginners, and for good reason. Begin with a small, tight spiral at the center, then gently build petal layers around it. Leaving the outer petals a little open gives the rose a soft, naturally blooming look instead of a heavy, filled-in feel. It looks delicate and realistic even on your first try.
2. Finger Ring Style
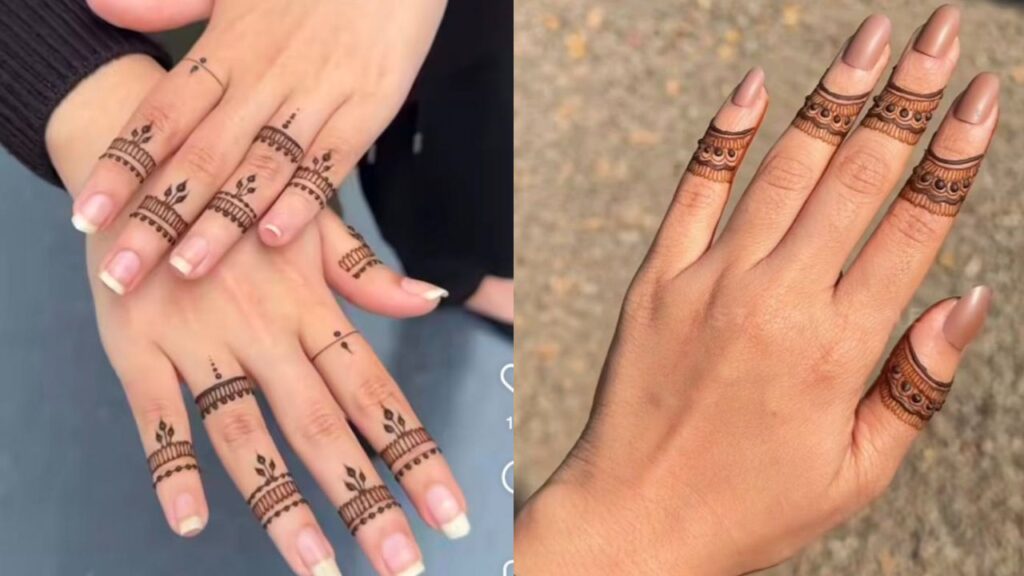
Steps: Draw a clean band across the finger → add fine vertical lines → connect them with tiny dots.
This design beautifully mimics delicate jewelry. A simple band wrapped around the finger, paired with subtle vertical lines and tiny connecting dots, creates an elegant ring effect. Use a fine-tipped cone for the dots — they’re what give it that realistic, dainty jewelry finish.
3. Triangle Chain
Steps: Draw small triangles in a row → alternate their direction → fill every second triangle.
A modern geometric pattern with a tribal touch. Create a chain of triangles pointing up and down alternately. Filling every other triangle creates beautiful high-contrast and makes the design pop. Perfect as a wristband, border, or finger accent.
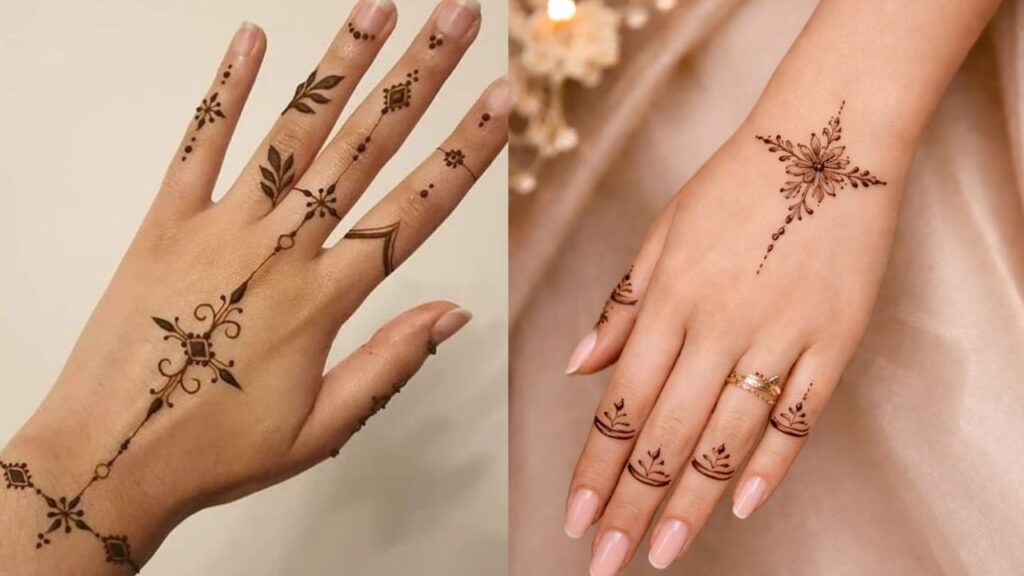
4. Star Motif
Steps: Draw a small five or six-pointed star → add a double outline → surround with dots.
Never underestimate the power of a simple star. A clean star with a double outline and a cluster of tiny dots around it instantly looks refined and intentional. Great as a standalone motif on the back of the hand or repeated in a larger design.
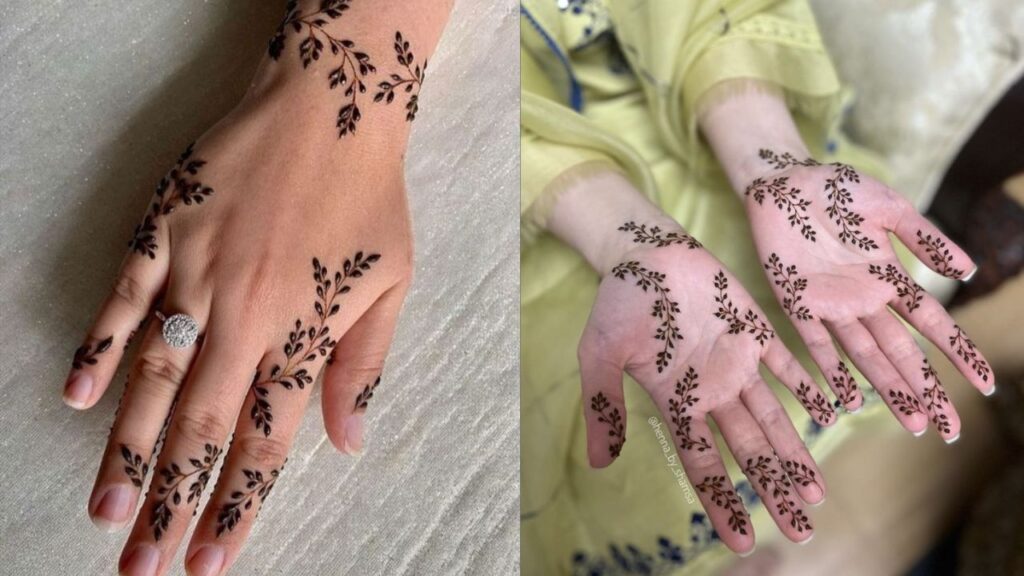
5. Minimal Wrist Vine
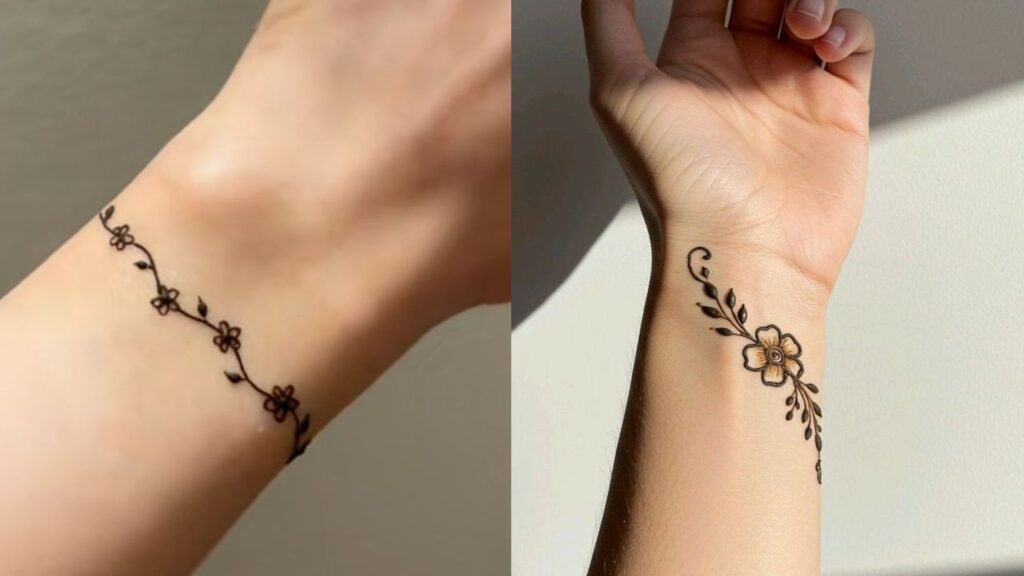
Steps: Draw a thin curving vine → add 3–4 leaves → keep plenty of spacing.
Sometimes less is more. A single graceful vine flowing along the wrist with just a few leaves creates an elegant, minimalist look. The secret is keeping the spacing wide and airy — this gives the design a sophisticated and delicate feel.
6. Corner Floral Design
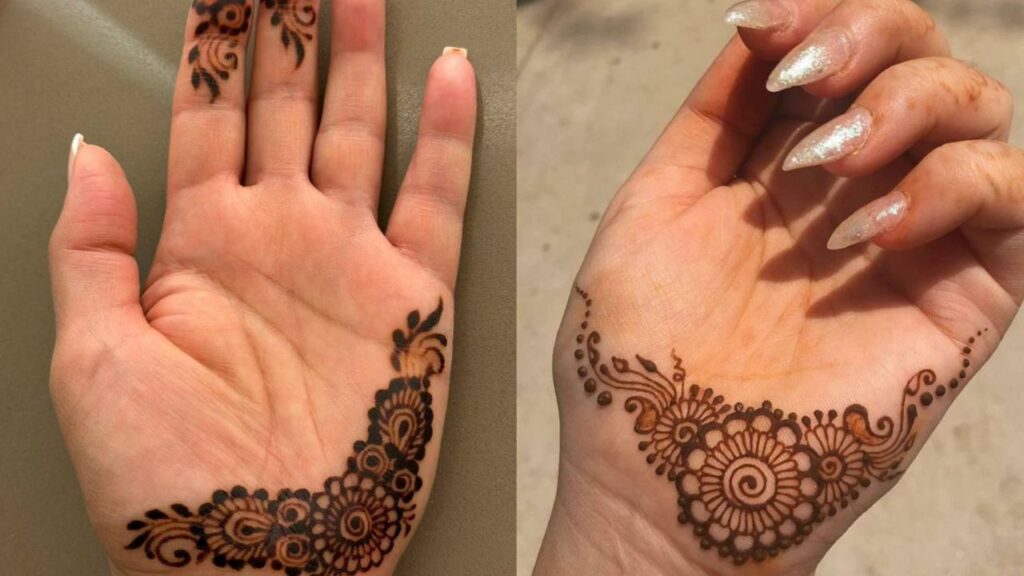
Steps: Start at the corner of the palm → draw a flower → extend soft vines inward.
Corner designs are perfect for beginners because the natural edge of your palm helps guide you. Begin with a flower in the corner and let gentle vines trail toward the center. It creates a beautiful “growing” effect that looks organic and effortless.
7. Dot Grid Design
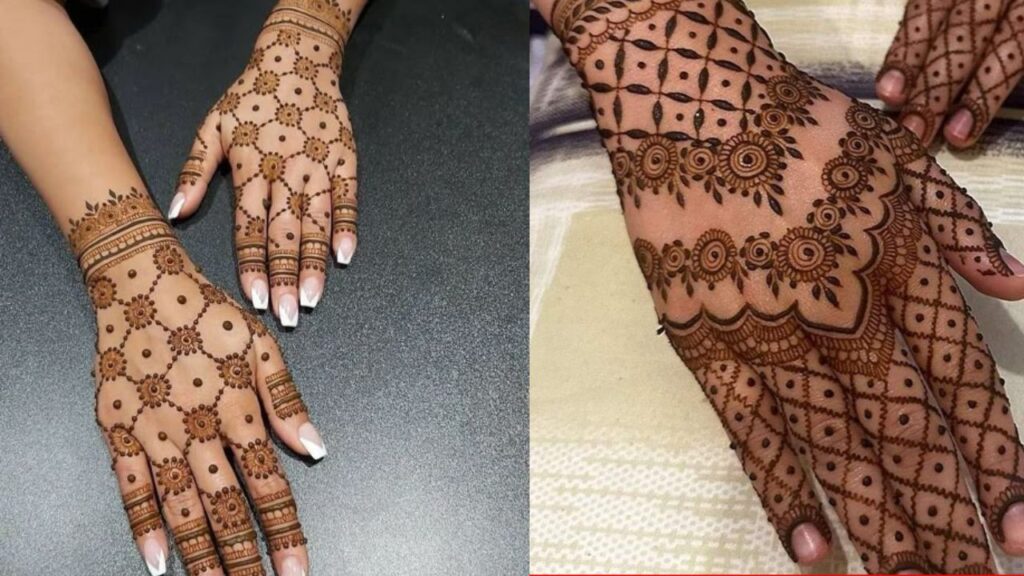
Steps: Place dots in a neat grid pattern → connect them creatively with lines.
This design is relaxing and highly customizable. Start by making evenly spaced dots, then connect them with straight or curved lines in any pattern you like. Every dot grid turns out unique, making it feel personal and creative every single time.
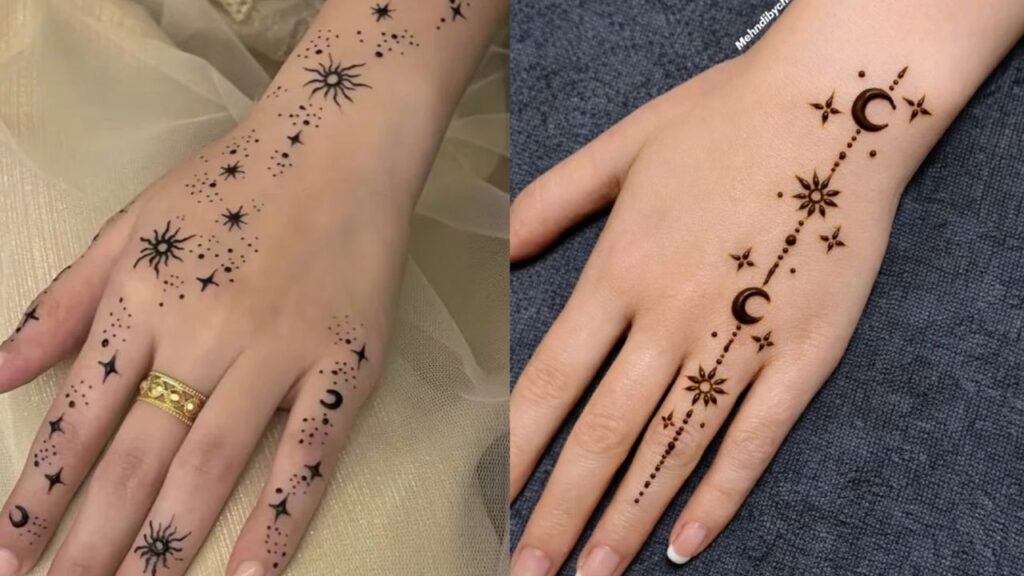
8. Crescent Moon Design
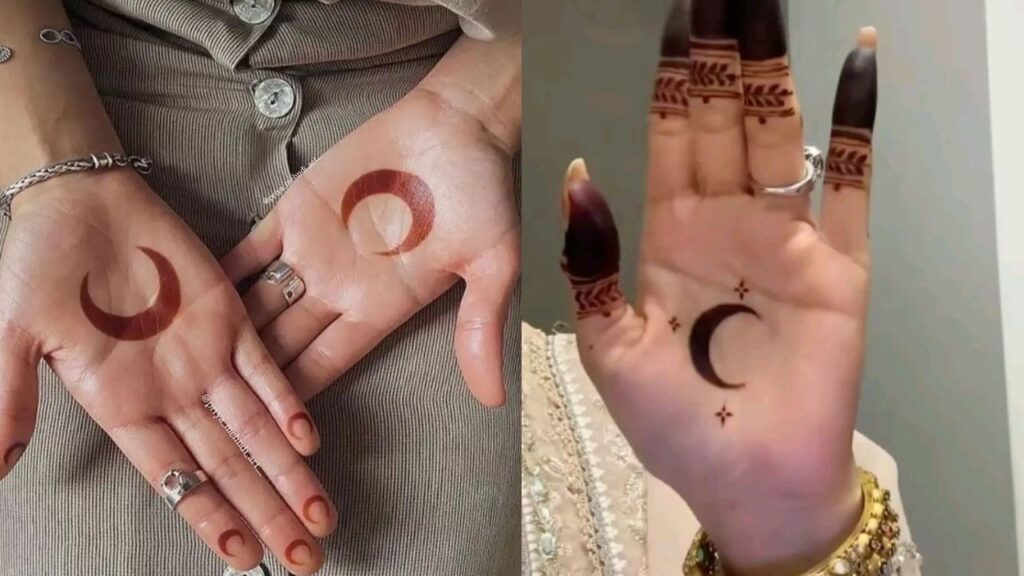
Steps: Draw a crescent moon → fill the inside with dots → decorate the outer curve.
There’s something peaceful and magical about a crescent moon. Fill the inner curve with dense tiny dots for richness, then add light detailing on the outer edge. It works wonderfully alone or as part of a starry, celestial theme.
9. Flower + Vine Combo
Steps: Draw a central flower → extend a vine from it → add leaves along the vine.
A timeless classic in mehndi. One beautiful flower with a flowing vine and a few leaves is elegant and never goes out of style. The best part? You can make it as short or long as you want — even a small version looks complete and beautiful.
10. Leaf Trail Design
Steps: Draw a gentle curved line → attach slanted leaves on both sides → add center veins in each leaf.
This design looks impressively detailed but is surprisingly easy. A single flowing line with leaves branching out on both sides creates movement and beauty. Adding a fine center vein in each leaf is the small touch that makes it look professional.
Conclusion
There you have it — 10+ simple yet stunning mehndi designs that are perfect for beginners! Remember, every beautiful mehndi you’ve admired started with someone just like you, holding a cone with slightly nervous hands.
Don’t worry about making it perfect. Mehndi is not about perfection — it’s about enjoying the process and creating something with your own hands. Start with any design that catches your eye, follow the steps patiently, and most importantly, have fun with it.
The more you practice, the more confident and creative you’ll become. Soon you’ll be mixing these motifs, changing sizes, and making your own unique patterns.
So pick up that cone, take a deep breath, and begin. Your first beautiful mehndi is waiting to be created.
Which design are you going to try first? Let me know in the comments